
How to Build a 1911 Slide: Instructions
Posted by Gunbuilders.com on Jun 11th 2024
If you've picked up a new 1911 slide, you're probably looking for help with assembly -- and you've come to the right place! NOTE: These instructions apply for all Series 70 slides (those that lack a firing pin safety).
Let's get started.
Tools
A small punch or screwdriver is necessary for compressing the firing pin spring, to make room for installing the pin stop. You'll also need a small flathead screwdriver, knife blade, or small pick to depress the slide stop detent on your frame when seating the slide.
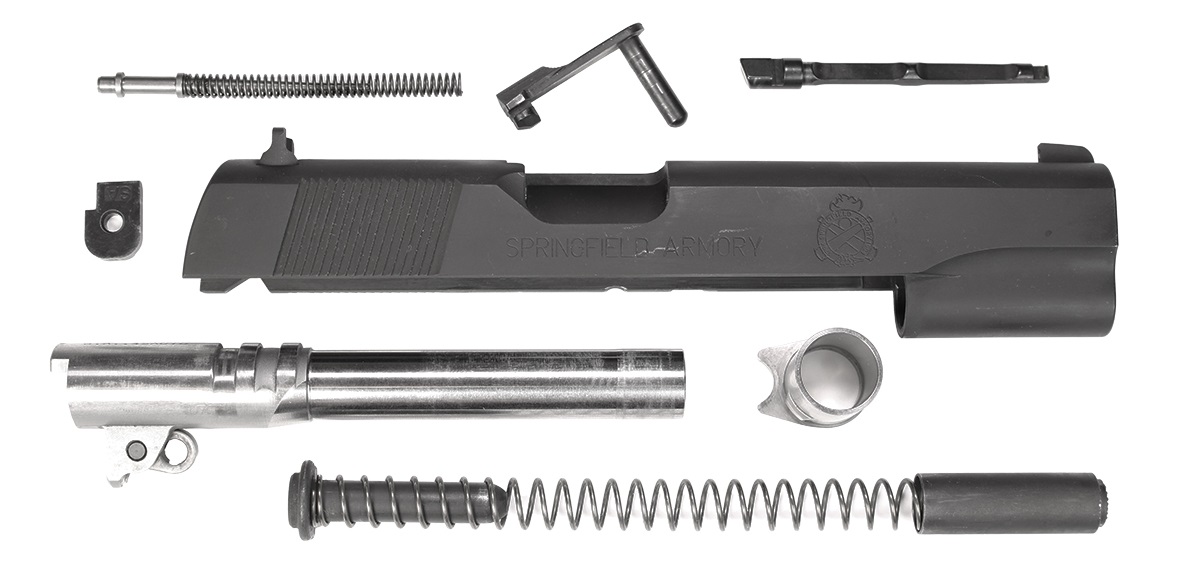
Slide Parts
Before beginning, ensure you have all required components to assemble your slide, listed and pictured below:
- Stripped slide
- Barrel bushing
- Barrel
- Operating rod
- Recoil spring
- Recoil spring plug
- Firing pin
- Firing pin spring
- Firing pin stop
- Extractor
- Slide stop (not required for assembly, but required to install slide onto frame)
Building The 1911 Slide: Instructions
Let's begin!
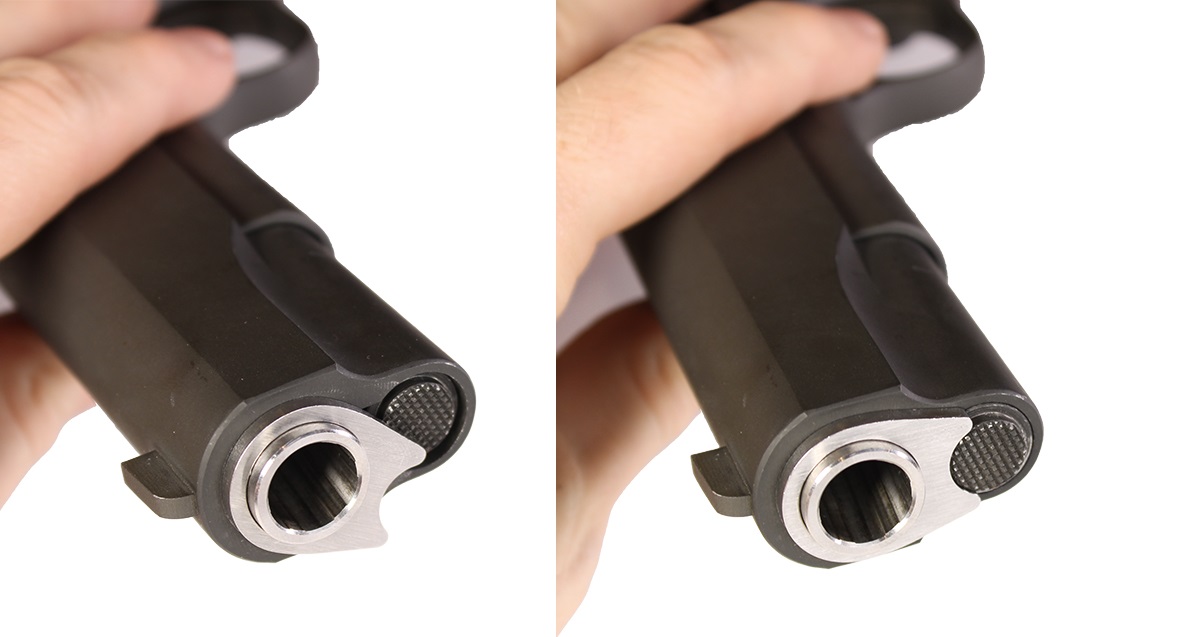
1. Install Extractor
Seat the extractor through the rear of the slide. Ensure the hook on the tip of the extractor is facing inward, toward the breech face.
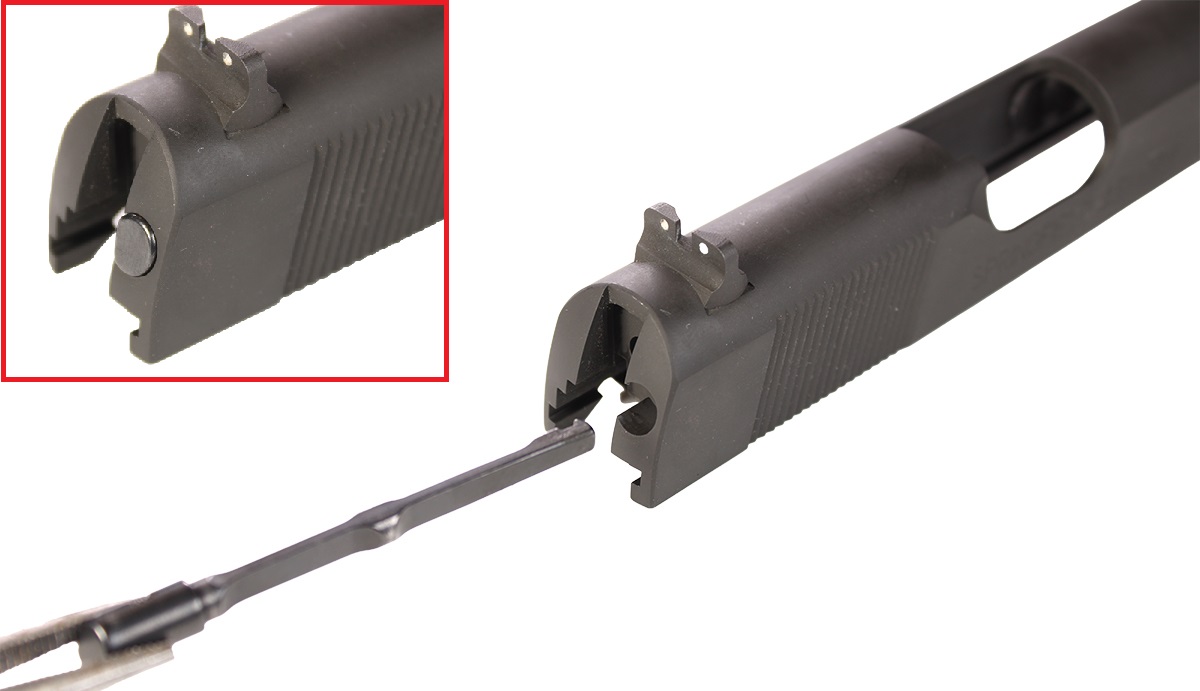
2. Install Firing Pin

Before installing the firing pin, ensure the pin's spring is fully seated on the pin. Slide the pin into the hole at the center rear of the slide, spring first.
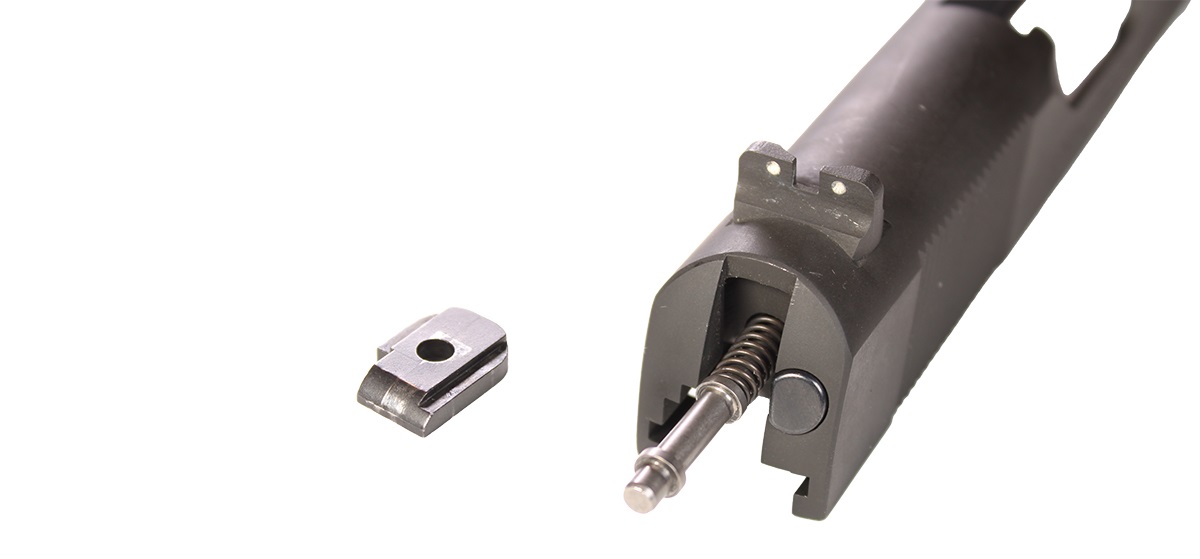
The rear of the pin will protrude from the slide. Press on the pin to compress its spring, and push the pin fully into the slide. A punch or screwdriver is helpful, here.
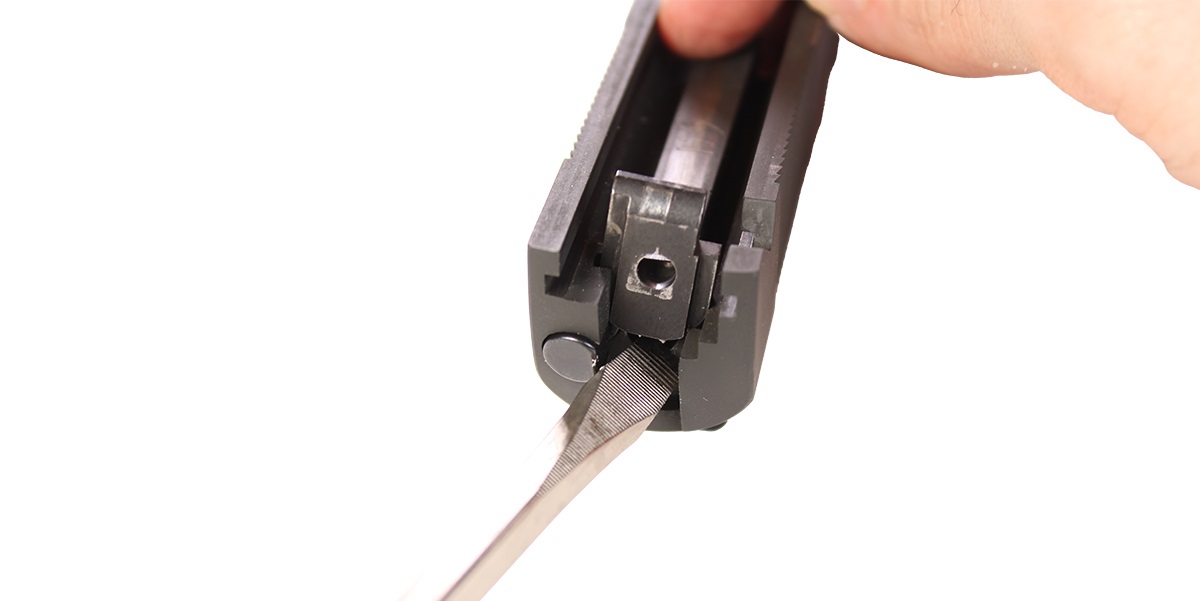
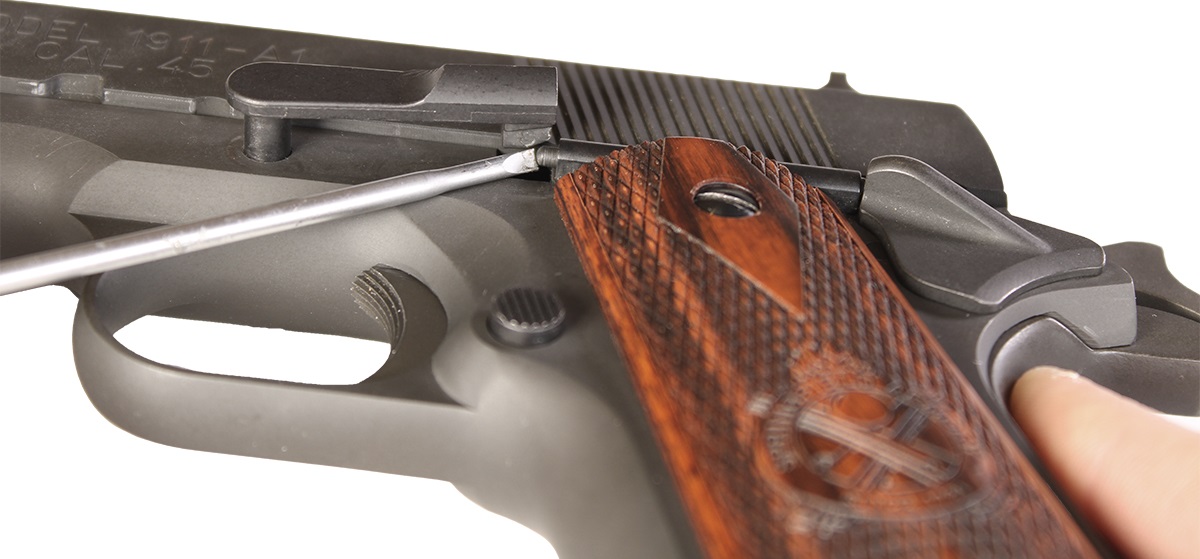
While compressing the firing pin, insert the pin stop. The sloped, hooked portion of the stop should face down and away from the top of the slide.

Once fully seated, the pin stop will capture the base of the firing pin, keeping itself and the spring in place under spring tension.
3. Install Barrel
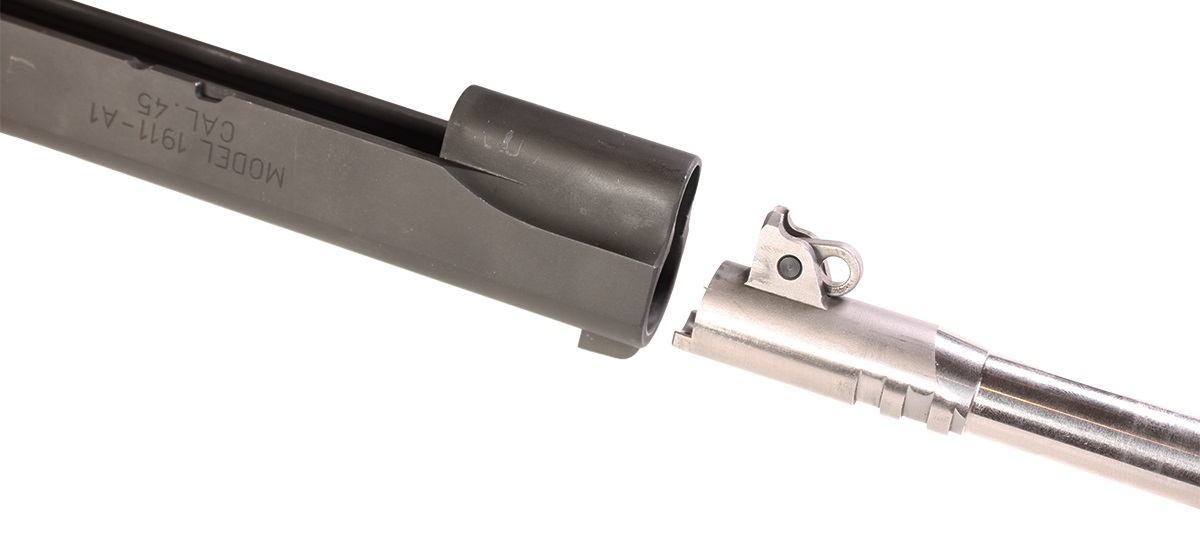
Push the barrel through the front of the slide. The lug on the barrel must be oriented to fit through the guide rod/recoil spring housing at the bottom of the slide.
The barrel must come to rest against the breech face; there will be a small gap between the chamber and face.
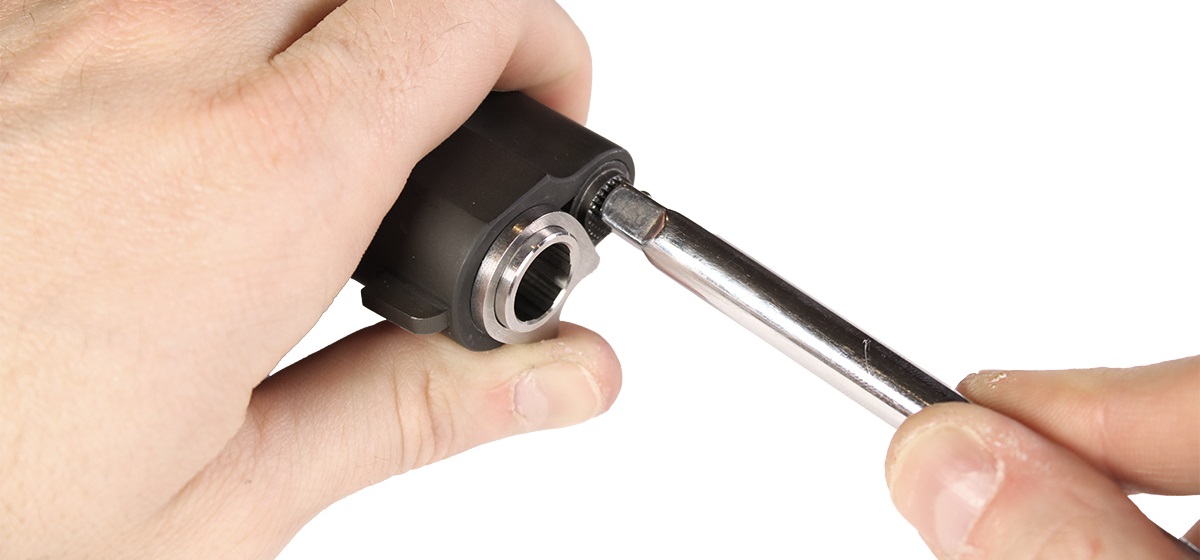
4. Install Barrel Bushing
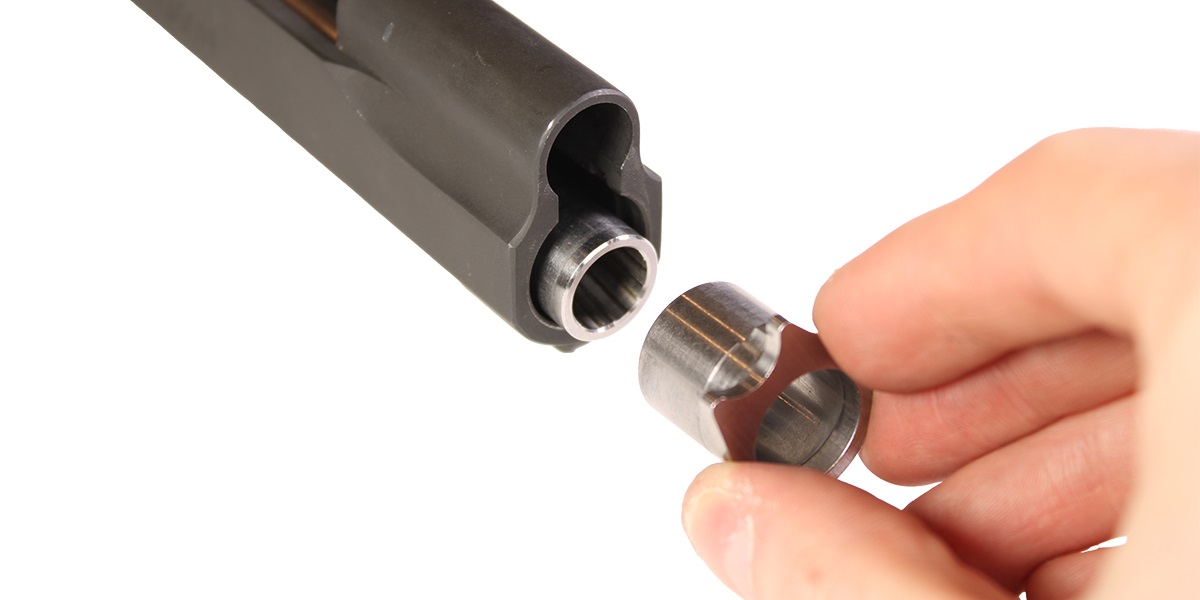
With the muzzle facing you, and the slide upside down, orient the barrel bushing so the lip faces the 10 o' clock position. Then slide the bushing over the barrel.
Once the bushing is pressed into the slide, rotate it clockwise until the lip faces the 3 o' clock position.
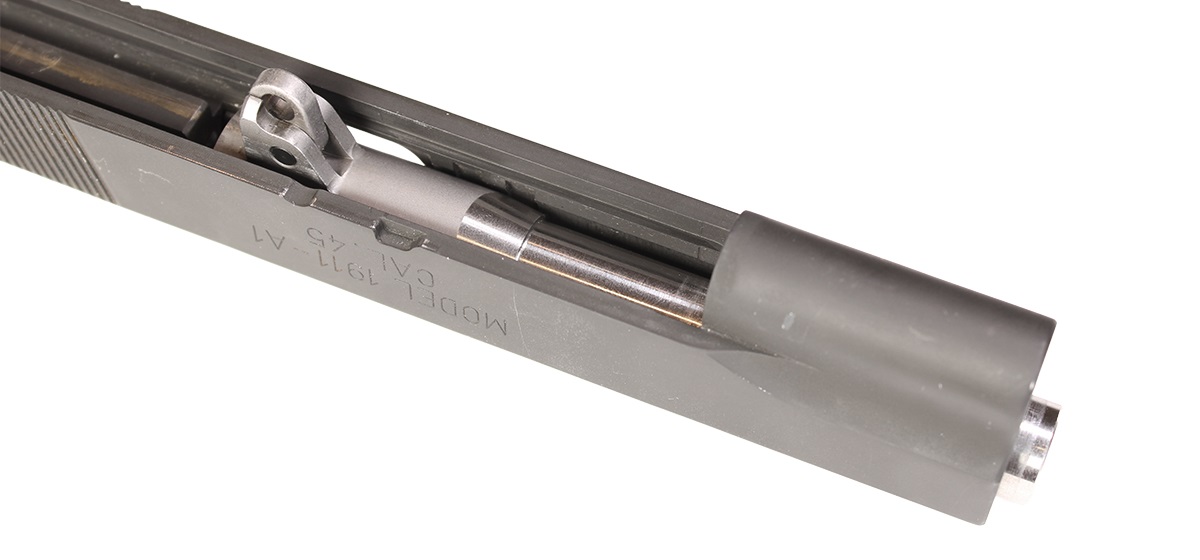
5. Install Guide Rod & Spring

Press the end of the recoil spring with the flat coil onto the guide rod. Then insert the opposite end of the spring through the back of the guide rod housing, until the end of the spring protrudes from the front of the slide.
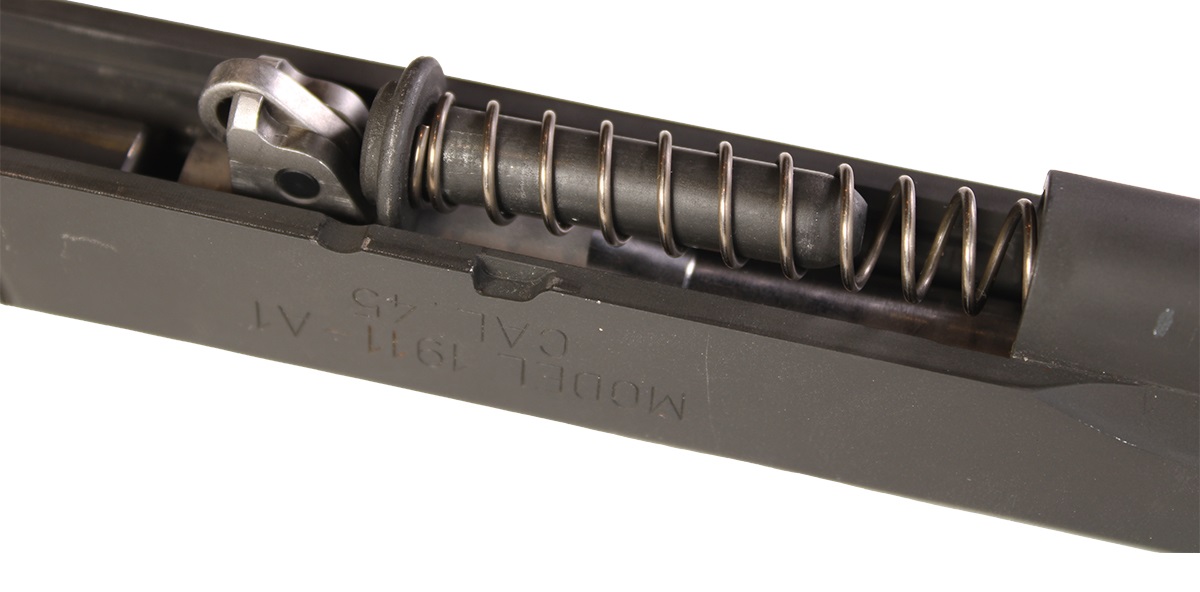
Rest the guide rod atop the barrel, directly against the barrel lug. The concave curved portion of the rod should rest atop the barrel.
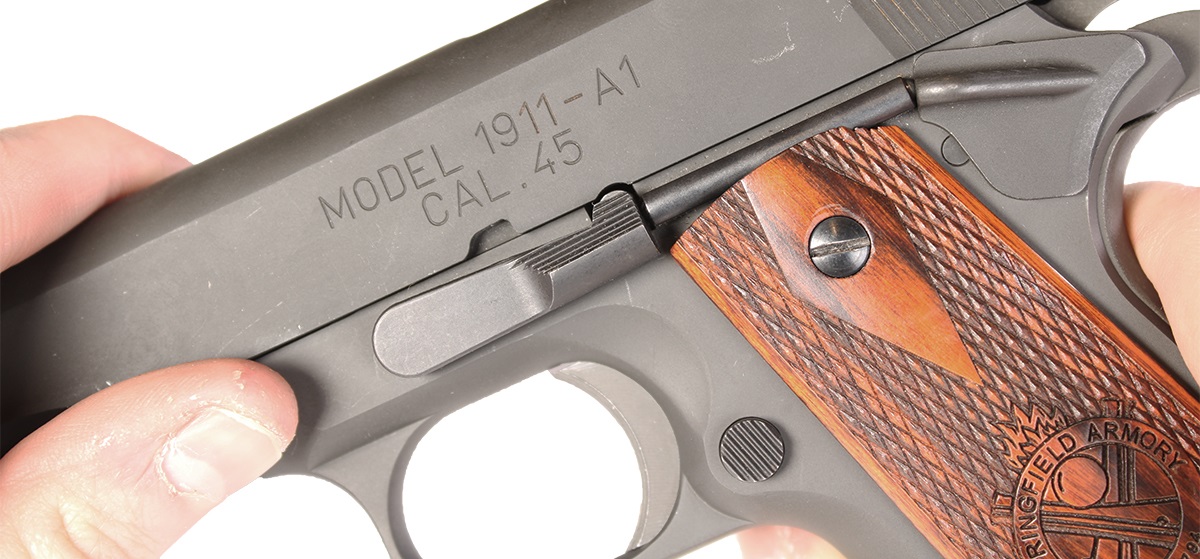
6. Install Slide Onto Frame
NOTE: Assembled frame with slide stop required.
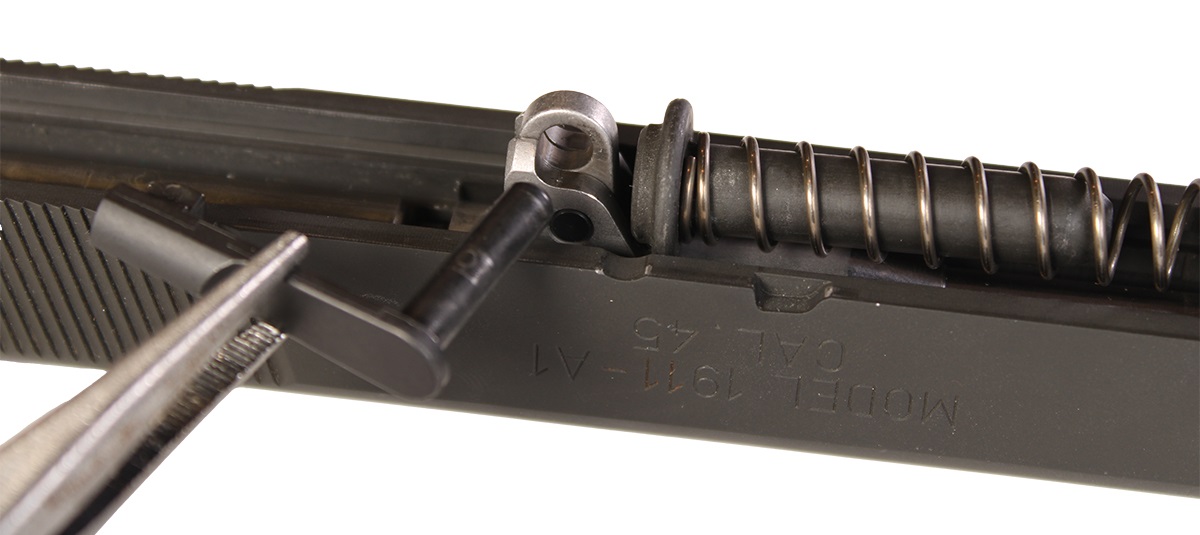
The slide stop pin connects the 1911's slide to its frame via the barrel lug.
Press the slide onto the front of the frame's slide rails.
Continue pushing the slide onto the frame until the slide stop pin hole on the frame aligns with the barrel lug's pin hole. You may need to manipulate the swiveling lug with a small tool to align it with the frame.
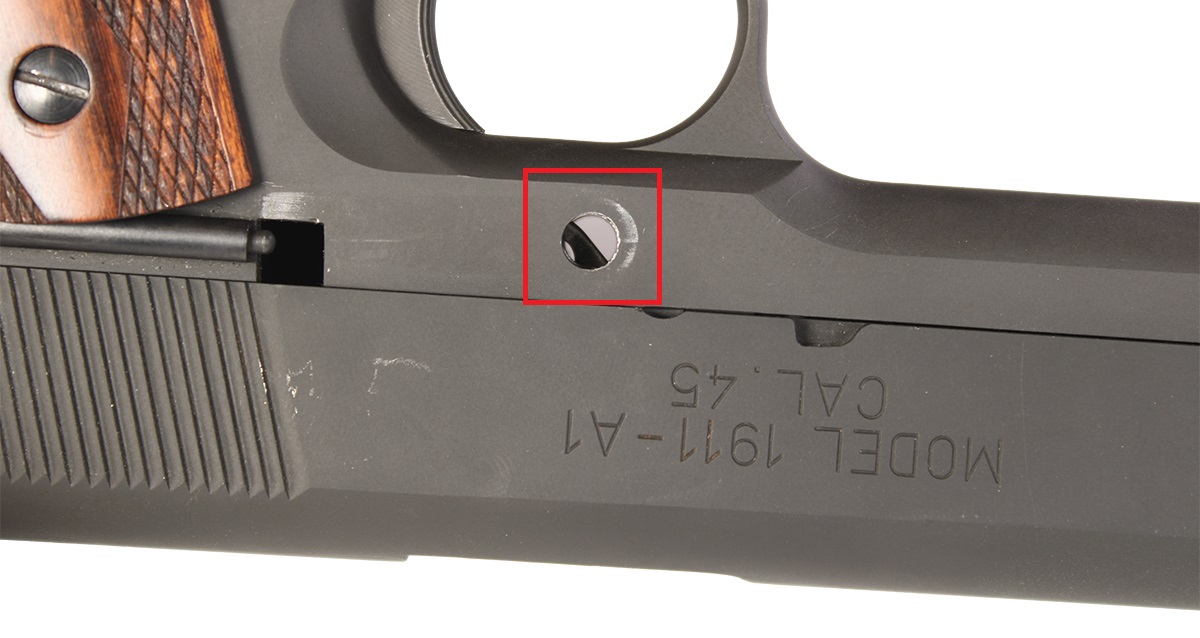
With both pin holes aligned, insert the slide stop. You will need to depress the slide stop's spring-loaded plunger/detent to fully seat the slide stop.
While pushing the slide stop flush against the frame, release the detent. It will snap into place, looking the slide stop against the frame.
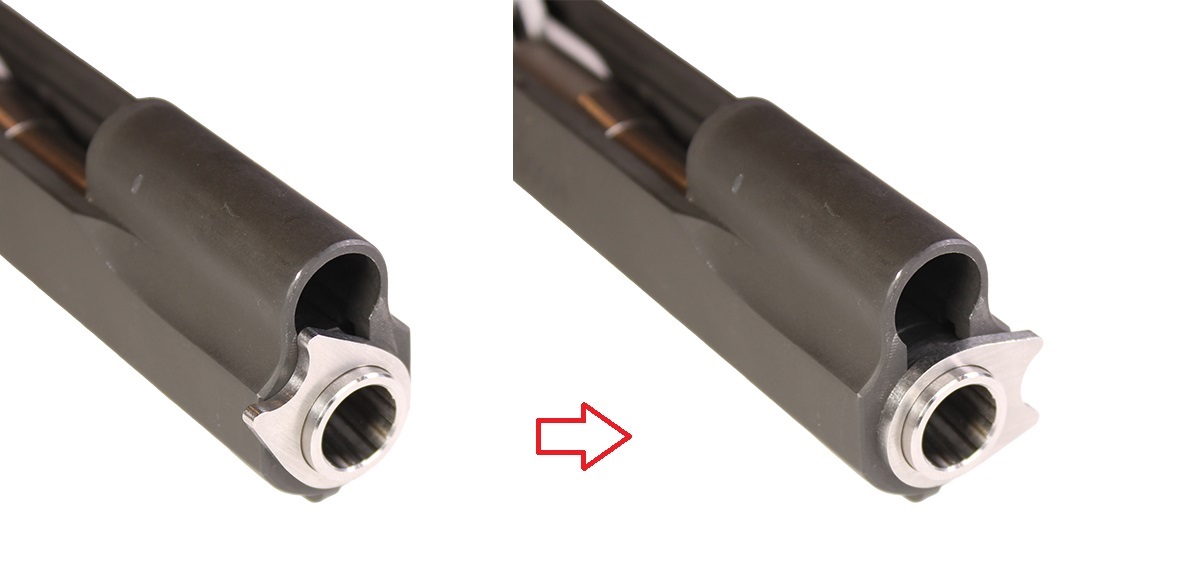
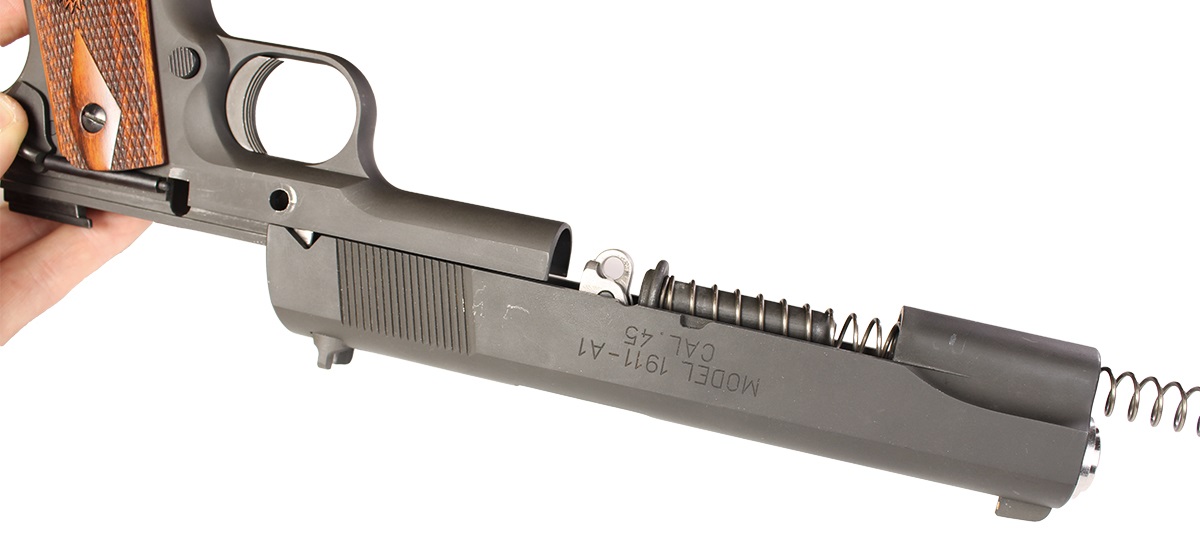
7. Install Recoil Spring Plug
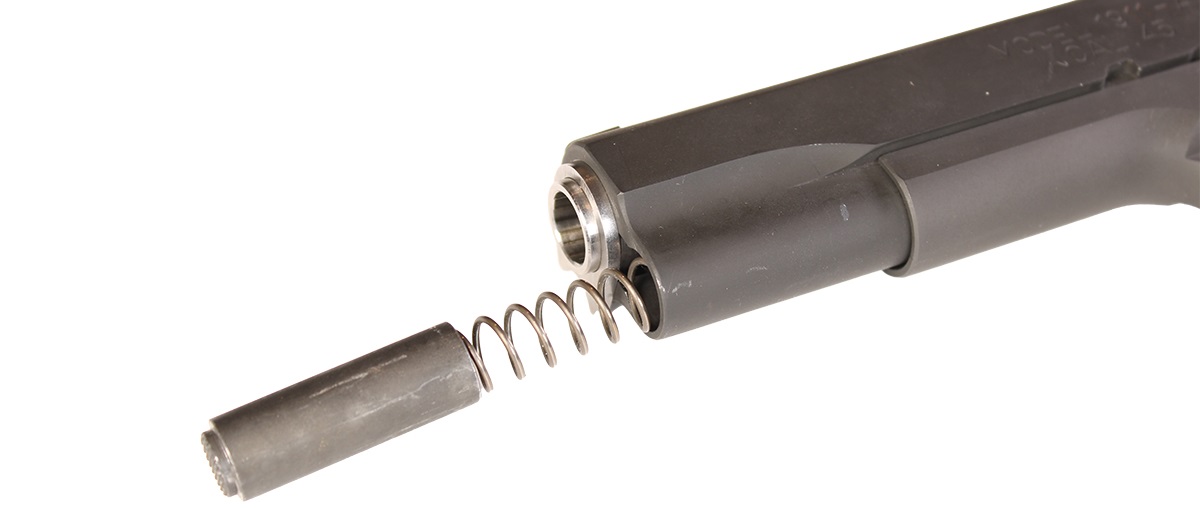
Lastly, seat the recoil spring plug atop the protruding portion of the recoil spring.
Compress the recoil spring and push the spring plug fully into the slide, past the barrel bushing.
While compressing the plug and spring, rotate the barrel bushing counter-clockwise, from its 3 o' clock position to a 12 o' clock position. The concave lip of the bushing will snap into place atop the plug, capturing it.
Your Slide Assembly is Complete!

Your 1911 slide is now fully assembled. Verify the function of the slide and frame:
- Rack the slide and test the slide stop.
- Release the slide stop and ensure the slide goes into battery.
- Verify the hammer cocks and remains cocked after racking the slide.
- Test the function of the thumb safety, verifying the trigger doesn't drop the hammer.
- Insert an empty magazine and test the magazine catch and release.
DISCLAIMER: If you are new to the world of DIY gun building, you likely have a lot of questions and rightfully so. It’s an area that has a lot of questions that, without the correct answers, could have some serious implications. At GunBuilders.com, we are by no means providing this content on our website to serve as legal advice or legal counsel. We encourage each and every builder to perform their own research around their respective State laws as well as educating themselves on the Federal laws. When performing your own research, please be sure that you are getting your information from a reliable source.